Now and then an incredible pair of pants will tag along and they very well might need their waistband altered. Fortunately, with regards to elastic waistbands alterations are entirely feasible. With the assistance of a companion, for that additional arrangement of hands, or without anyone else, you must have the option to fix stretched elastic waistband trying to improve fit.
Things You’ll Need
- Sewing machine or Needle and Thread
- Safety pin
- Scissors
- Stage 1
Put the piece of clothing on. Wearing the article of clothing during tighten elastic waistband guarantees a right fit.
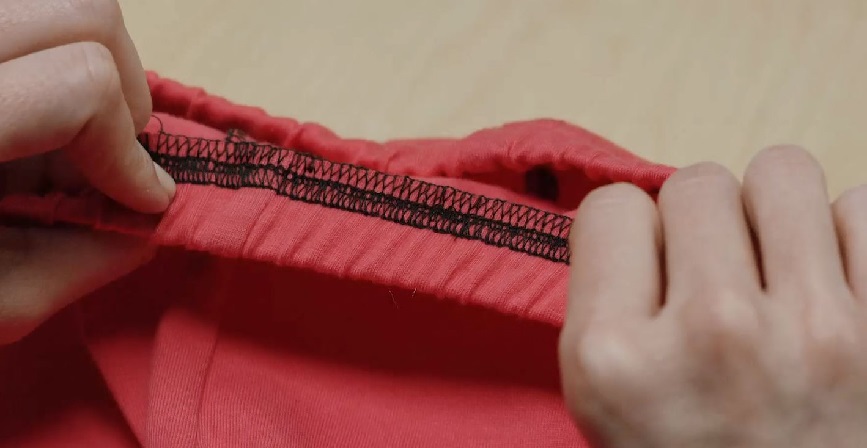
- Stage 2
Cut the seam of the article of clothing and be careful not to cut the elastic itself. Haul out the elastic and measure the amount it should be diminished. Fold it over and place a safety pin on it; hold the elastic shut with the goal that you will have a feeling of the fit when wrapped up. Locate an agreeable fit.
- Stage 3
Sew the elastic shut at the point that it has been folded and remove the safety pin.
- Stage 4
Sew the article of clothing back up at the seam and fold it in to account for a littler waistband.
- Tip
Not slicing the elastic enables you to expand the waistband or set it back to its unique size if necessary.
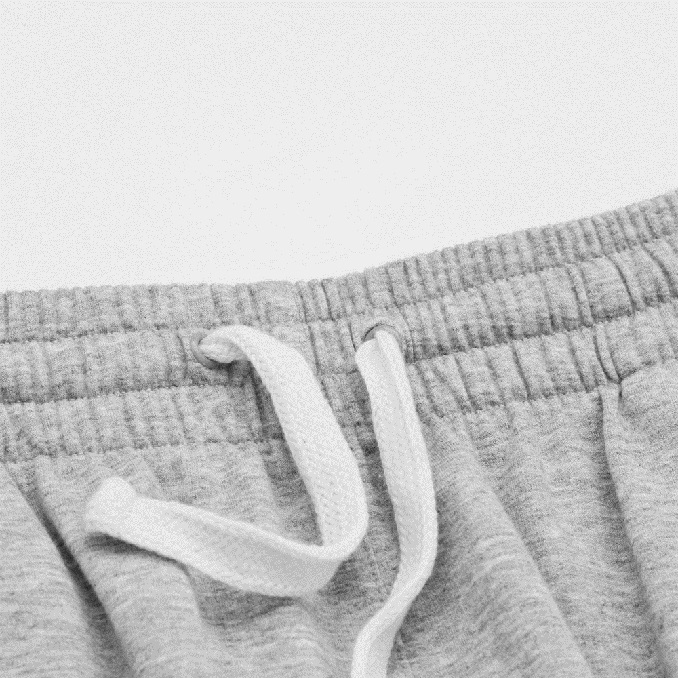
There is another way you can repair elastic waistband (or sweatshirt hoodie cord things) that leave the circle they should remain in.
Materials required:
- Ballpoint pen
- Clothing plus lost band
- Scotch tape
- Stage 1: Preparing the Pen
The stunt was to discover a needle-like item that is skinny, pointy, and flexible. In the wake of ransacking your apartment, you can unearth the center ink thing from my ballpoint pen. You can remove it from the pen and attach it to the elastic with firmly twisted scotch tape.
- Stage 2: Threading It
 It’s essential to move the pen/elastic combo gradually, and to realize when to push against the fabric and when to straightforwardness up.
When you start to follow the way around the waistband, be careful with obstacles where the fabric leaves just a little space between the stitching for the drawstring, and likewise of jabbing through the fabric as opposed to following the elastic band way.
- Stage 3: Bunching
Bunching method works really well. With one hand you need to push the fabric over the ballpoint, and utilized the other hand to pull it through.
- Stage 4: And Out the Other Side
In the long run you should turn out the opposite end once more.
- Stage 5: Preventative Measures
Make certain to tie those enormous knots at last that you were too apathetic to even consider doing in any case. And make the most of your old garments once more.